To provide a comprehensive understanding of the best settings for the Canon Rebel XTi (EOS 400D) DSLR camera, let’s break it down into scenarios where you might be shooting different types of images. This will help illustrate how to adjust your settings to get the best results across various conditions.
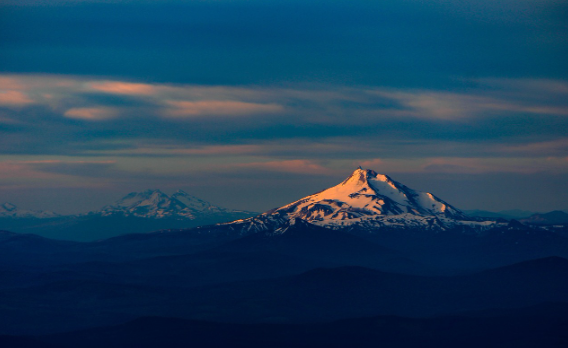
1. Landscape Photography
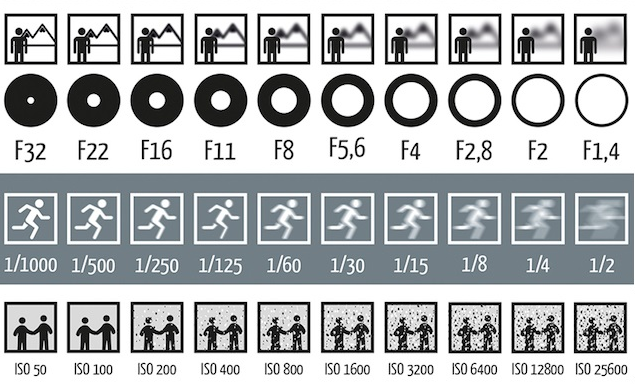
- Mode: Aperture Priority (Av). This allows you to control the depth of field.
- Aperture: f/8 to f/16 to ensure sharpness across the entire scene.
- ISO: Set to 100 or 200 to minimize noise.
- Shutter Speed: Will be determined by the camera based on lighting; use a tripod if the speed is slow to prevent camera shake.
- Focus: Manual focus or autofocus with a focus point set to infinity.
- White Balance: Daylight or Cloudy, depending on the weather.
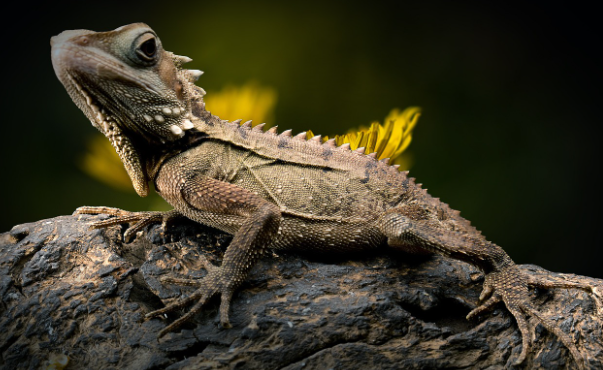
2. Portrait Photography
- Mode: Aperture Priority (Av) to control the depth of field and blur the background.
- Aperture: f/1.8 to f/5.6 to keep the subject in sharp focus while blurring the background.
- ISO: 100-400 in bright conditions; increase to 800 or higher in low light.
- Shutter Speed: Will adjust automatically; ensure it’s fast enough (at least 1/100s) to freeze any minor movements.
- Focus: One Shot AF with the focus point on the subject’s eye.
- White Balance: Auto or adjust manually to suit the lighting conditions.
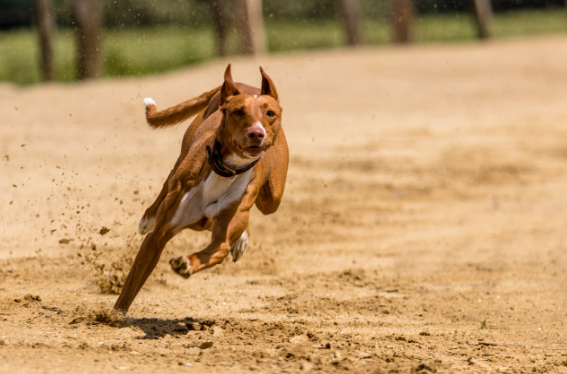
3. Sports or Action Photography
- Mode: Shutter Priority (Tv) to ensure motion is captured as intended.
- Shutter Speed: 1/500s or faster to freeze action. Adjust based on the speed of the subject.
- Aperture: The camera will select; may need to adjust ISO to ensure the aperture is sufficient for the light available.
- ISO: Start at 400 and increase as needed to allow a faster shutter speed.
- Focus: AI Servo AF to track moving subjects.
- White Balance: Auto or match to the lighting conditions.
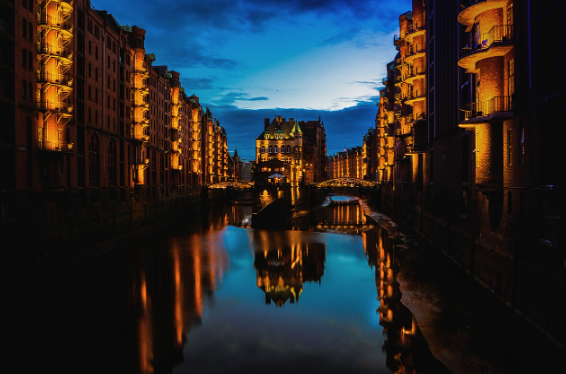
4. Low Light or Night Photography
- Mode: Manual (M) for complete control over the exposure.
- Shutter Speed: Varies; could be seconds long for night landscapes. Use a tripod to prevent camera shake.
- Aperture: Wide open (low f-number) to allow as much light in as possible.
- ISO: Start at 800 and adjust as needed. Be mindful of noise at high ISO levels.
- Focus: Manual focus might be necessary if autofocus struggles in low light.
- White Balance: Tungsten or Fluorescent presets can help with artificial lighting, or manually adjust for accuracy.
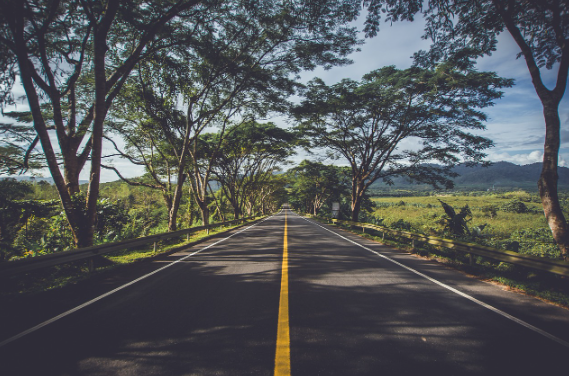
5. General Use or Street Photography
- Mode: Program (P) for quick shots or Aperture Priority (Av) for more control.
- Aperture: f/4 to f/8 for a balance between depth of field and exposure.
- ISO: 100-400 in daylight; increase as needed in lower light.
- Shutter Speed: Auto-adjusted; ensure it’s fast enough for handheld shooting.
- Focus: One Shot AF for static scenes or AI Servo AF for moving subjects.
- White Balance: Auto usually works well.
Tips for All Scenarios:
- Review Your Images: Use the histogram and playback features to review exposure and focus.
- Shoot in RAW: For maximum post-processing flexibility.
- Experiment: Don’t be afraid to deviate from these settings to find what works best for you and the scene.
By adjusting your Canon Rebel XTi’s settings according to these guidelines, you’ll be well-equipped to capture beautiful photos in a variety of situations. Remember, the “best” settings depend on the light, your subject, and the creative outcome you’re aiming for.
What best camera setting to take best photo in Canon Rebel XTi DSLR Camera | Canon Rebel XTi DSLR Camera setting
To take the best photos with the Canon Rebel XTi (EOS 400D), the optimal settings will depend on the lighting conditions, the subject, and the creative outcome you desire. However, I can provide you with a general guideline that you can adapt to various situations. Remember, photography is about experimentation and adaptation, so don’t hesitate to adjust these settings as needed.
1. Shooting Mode
- Aperture Priority (Av): Good for controlling depth of field. Use a wide aperture (low f-number) for portraits to blur the background, or a narrow aperture (high f-number) for landscapes to keep everything in focus.
- Shutter Priority (Tv): Ideal for controlling motion. Use a fast shutter speed to freeze action or a slow shutter speed for motion blur effects.
- Manual (M): Best for full control when you’re comfortable adjusting aperture, shutter speed, and ISO.
2. ISO Setting
- Bright Conditions: Start at ISO 100 or 200 to minimize noise.
- Low Light: Increase ISO as needed, but be mindful of noise. ISO 800 and above may introduce noticeable noise, but it’s a trade-off for exposure.
3. Aperture
- Portraits: f/1.8 to f/5.6 to separate the subject from the background.
- Landscapes: f/8 to f/16 for greater depth of field and sharpness across the scene.
4. Shutter Speed
- General Rule: 1/(Focal Length) for handheld shooting to avoid blur. For a 50mm lens, aim for at least 1/50s.
- Action Shots: 1/500s or faster to freeze motion.
- Low Light or Motion Blur: Use a tripod and experiment with speeds slower than 1/60s.
5. Focus
- Autofocus (AF): Use One Shot AF for stationary subjects and AI Servo AF for moving subjects.
- Manual Focus (MF): For challenging focus situations or when precise control is needed.
6. White Balance
- Auto White Balance (AWB): Works well in most situations.
- Manual White Balance: Adjust according to lighting conditions for more accurate colors.
7. Metering Mode
- Evaluative Metering: Good for general use.
- Spot or Partial Metering: Useful for scenes with high contrast or when you need to meter off a specific area of the frame.
8. File Format
- RAW: Offers the most flexibility for post-processing, allowing you to tweak exposure, white balance, and other settings without quality loss.
- JPEG: Use when you need smaller files and minimal post-processing.
9. Drive Mode
- Single Shooting: For most photography needs.
- Continuous Shooting: Useful for capturing action or fleeting moments.
Final Tips:
- Review and Adjust: Regularly review your photos and adjust settings as needed.
- Practice: Experiment with different settings in various conditions to see what works best for you.
- Learn and Adapt: Photography is about understanding light and composition. The more you learn and practice, the better you’ll get at choosing settings intuitively.
By starting with these settings and adapting them to your specific situation, you’ll be well on your way to capturing great photos with your Canon Rebel XTi.
How to click best picture in Canon Rebel XTi DSLR Camera | Canon Rebel XTi DSLR Camera setting
Taking the best picture with a Canon Rebel XTi (EOS 400D) involves understanding both the technical aspects of the camera and the artistic elements of photography. Here are some tips to help you make the most out of your Canon Rebel XTi and capture stunning images:
1. Understand Your Camera’s Settings
- Learn Manual Mode: Familiarize yourself with manual mode (M) to gain full control over the exposure settings—aperture, shutter speed, and ISO.
- Use Aperture Priority (Av) or Shutter Priority (Tv): If manual mode seems daunting, use Aperture Priority to control depth of field or Shutter Priority to manage motion blur.
- Adjust ISO Sensitively: Keep ISO as low as possible to reduce noise, but don’t hesitate to increase it in low-light conditions to ensure your shot is well-exposed.
2. Master the Focus
- Use Autofocus Points: Selectively use autofocus points to focus on your subject accurately, especially in compositions where the subject is not in the center.
- Manual Focus: In low light or when photographing subjects with little contrast, switch to manual focus for better control.
3. Composition is Key
- Follow the Rule of Thirds: Imagine your image divided into nine equal segments by two vertical and two horizontal lines. Try to position the most important elements along these lines or at their intersections.
- Explore Angles: Don’t just shoot from eye level. Experiment with different angles and perspectives for a more dynamic composition.
4. Understand Lighting
- Golden Hour: Shoot during the golden hour (shortly after sunrise or before sunset) for warm light and long shadows.
- Diffuse Harsh Sunlight: Use a diffuser or shoot in the shade during midday when the sunlight is harsh.
- Use Fill Flash: Enable the built-in flash or an external one to fill in shadows, especially for portraits under harsh sunlight.
5. Lens Matters
- Utilize Your Kit Lens: The EF-S 18-55mm lens is versatile. Use wider angles for landscapes and the telephoto end for portraits with blurred backgrounds.
- Consider Other Lenses: Explore prime lenses (like a 50mm f/1.8) for sharper images and better performance in low light.
6. Experiment with Different Settings and Techniques
- Try Long Exposures: Use a tripod and slow shutter speeds to capture motion, such as flowing water or cityscapes at night.
- Play with Depth of Field: Use a wide aperture (low f-number) for portraits to get a blurred background, or a narrow aperture (high f-number) for landscapes to keep everything in focus.
7. Post-Processing
- RAW vs. JPEG: Shoot in RAW for more flexibility in post-processing, allowing you to adjust exposure, white balance, and other settings without quality loss.
- Learn Basic Editing: Use photo editing software to crop, adjust exposure, enhance colors, and correct any imperfections.
8. Practice and Review
- Practice Regularly: The more you shoot, the better you’ll get. Try different subjects, settings, and techniques.
- Review Your Photos: Analyze what works and what doesn’t. Pay attention to lighting, composition, and settings used.
Capturing the best picture with the Canon Rebel XTi is a mix of technical skill, creative vision, and practice. Experiment with different settings, understand the light, compose your shots thoughtfully, and don’t forget to enjoy the process of learning and photography.
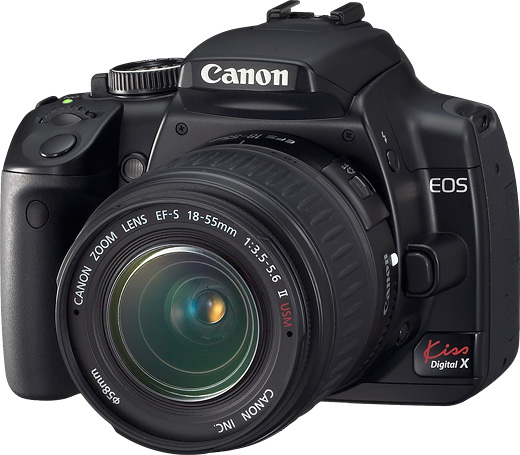
Full camera settings for Canon Rebel XTi DSLR Camera with EF-S 18-55mm f/3.5-5.6 Lens
The Canon Rebel XTi, also known as the EOS 400D outside of North America, is a digital single-lens reflex (DSLR) camera that was introduced by Canon in 2006. It came with an EF-S 18-55mm f/3.5-5.6 kit lens, which is a versatile lens suitable for a wide range of photography from landscapes to portraits. Here are the full camera settings and specifications for the Canon Rebel XTi with the EF-S 18-55mm f/3.5-5.6 lens:
Canon Rebel XTi (EOS 400D) Specifications:
- Sensor: 10.1 megapixel APS-C CMOS sensor
- Image Processor: DIGIC II
- ISO Sensitivity: 100-1600 (in 1-stop increments)
- Autofocus System: 9-point AF system
- Metering Modes: 35-zone evaluative, partial, spot, center-weighted average
- Shutter Speed Range: 1/4000 to 30 seconds, bulb
- Continuous Shooting: Up to 3 fps
- Viewfinder: Optical pentamirror, approx. 95% coverage, 0.8x magnification
- LCD Screen: 2.5-inch, 230,000 dots
- Flash: Built-in pop-up flash; E-TTL II flash metering
- Storage: CompactFlash (CF) Card Type I & II
- File Formats: JPEG, RAW (12-bit Canon original)
- Connectivity: USB 2.0 (Hi-Speed), video output (NTSC/PAL)
- Battery: Rechargeable Li-ion Battery LP-E5
- Dimensions: 126.5 x 94.2 x 65 mm
- Weight: Approx. 510g (body only)
EF-S 18-55mm f/3.5-5.6 Lens Specifications:
- Focal Length & Maximum Aperture: 18-55mm 1:3.5-5.6
- Lens Construction: 11 elements in 9 groups
- Diagonal Angle of View: 74° 20′ – 27° 50′
- Focus Adjustment: AF (DC motor), with manual focus option
- Closest Focusing Distance: 0.28m / 0.92 ft.
- Zoom System: Rotating type
- Filter Size: 58mm
- Max. Diameter x Length, Weight: 68.5 x 70 mm, approx. 200g
These specifications cover the core capabilities and features of the Canon Rebel XTi DSLR camera and the EF-S 18-55mm f/3.5-5.6 lens. This setup was well-regarded for its time, offering a solid entry-level DSLR option for amateur photographers and enthusiasts looking to step into the world of DSLR photography.
Keep practice, Keep explore, keep errors but do not stop
Your writer name is: Tushar Mengal